


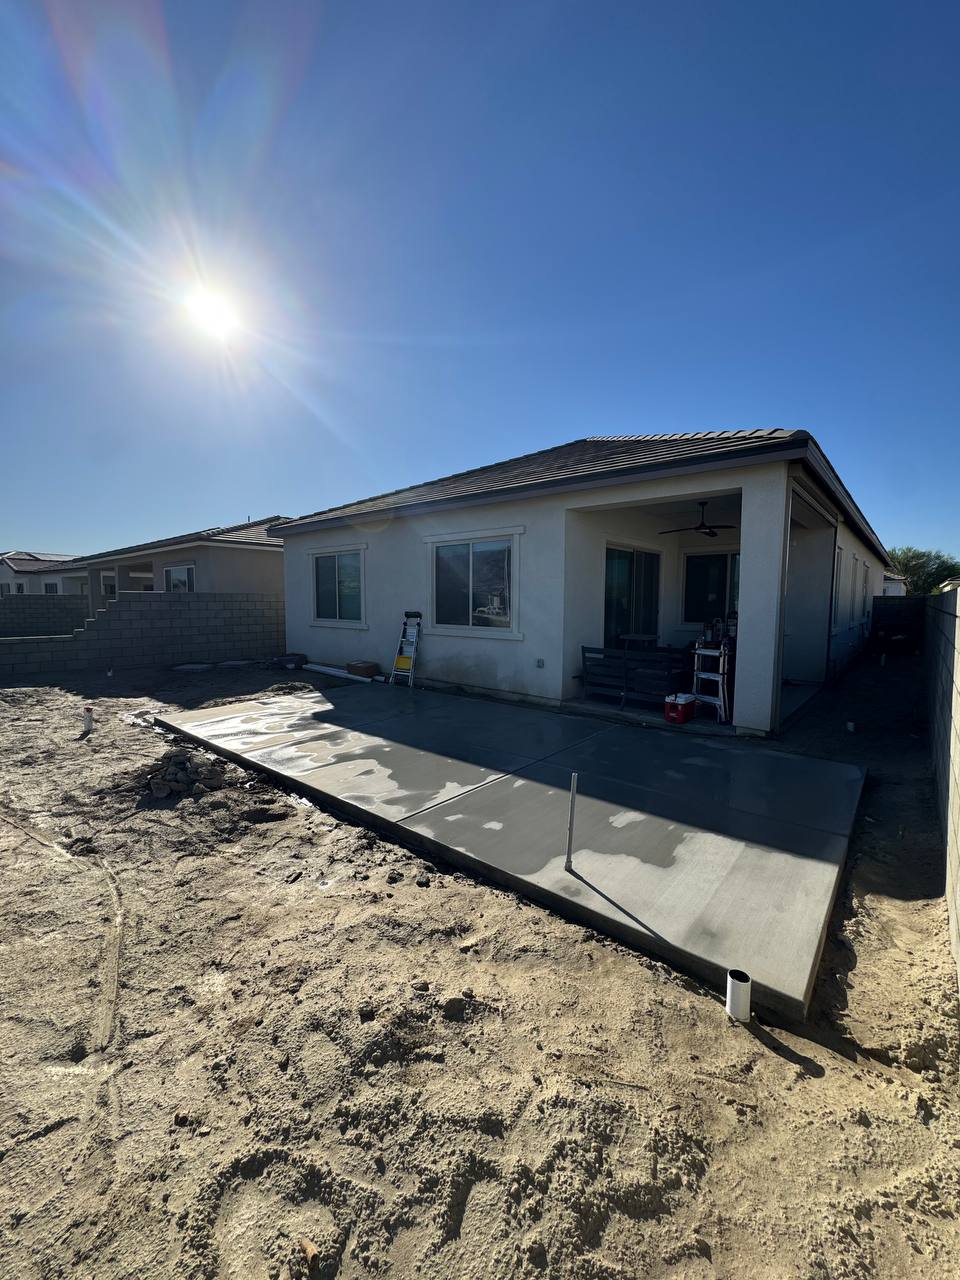
After buying a pergola, confirm the exact model, size and mounting type; save the matching manual and packing list; inspect the delivery; and document the patio, access, support, drainage and power requirements. Ask the building department responsible for your address about government review, and check HOA requirements separately. Resolve missing parts, required documents and responsibility for each task before scheduling assembly. A complete project file helps identify problems while there is still time to correct them.
If the pergola is on a delivery truck or the boxes are already in your garage, start by checking what you bought, what arrived and whether the proposed location is ready for that exact structure. Product, delivery and site questions are easier to resolve before a crew is waiting in the yard.
Pergola kit readiness checklist
Identify the kit
Match the brand, series, size and mounting type to the order and carton labels.
Collect the documents
Save the exact assembly manual, packing list, drawings and accessory instructions.
Check the delivery
Record carton counts, damage and shortages before the crew visit.
Review the location
Photograph access, proposed post positions, the base and any house connection.
Resolve approvals and power
Confirm the responsible jurisdiction, HOA review and any electrical work.
Agree on responsibilities
Write down who supplies parts, prepares the site and handles unresolved items.
Confirm the exact pergola kit you ordered
The same nominal size can describe several different products. Freestanding and wall-mounted versions may use different posts, beams, brackets and assembly sequences. A manual roof and a motorized roof may also need different controls, wiring and accessory components.
Find the order confirmation and the label on the packaging. Record the manufacturer, product name, series or generation, nominal size, color and mounting type. If the order includes screens, shutters, lighting, heaters, a fan beam or smart controls, list those items separately.
- Product identity
- Brand, model, series or generation
- Configuration
- Size, height and freestanding or wall-mounted layout
- Options
- Roof controls, screens, lights, heaters and other ordered accessories
Start with the order confirmation and carton labels. If the label, manual and order disagree, ask the seller to identify the correct product before you open more boxes or schedule assembly.
Find the correct assembly manual before delivery
Save the manual that matches the exact kit, together with its packing list, technical drawings and accessory instructions. The documents help establish the assembly sequence, lifting needs, tools, anchor assumptions and special steps for motors or accessories.
BON Pergola, PERGOLUX and Hanso Home publish product-specific assembly material. These are useful examples of why a similar-looking manual found in search results is not enough: check the model, generation, size and mounting type against your order.
- BON Pergola installation guides
Start with the named pergola model and collect the separate instructions for its accessories.
- PERGOLUX assembly manuals
Match the series, size and mounting type. Check the accessory documents for the same system.
- Hanso Home pergola manuals
Distinguish freestanding from wall-mounted versions and manual operation from motorized operation.
If a document is missing or does not match the order, request clarification from the seller. Check the seller’s inspection, return and damage-reporting deadlines rather than waiting until the scheduled crew visit.
Inspect the pergola shipment and keep a record
A delivered kit may contain several long cartons, smaller hardware boxes and accessory packages. Photograph the shipment before moving it. Capture shipping labels, carton numbers and visible damage. Compare the package count with the bill of lading or packing list.
If a carton is crushed, punctured or wet, document it before opening. Follow the seller’s damage-reporting process. When boxes are opened, keep hardware grouped by label and avoid mixing fasteners from different cartons. Small brackets and connectors can look interchangeable even when they are not.
Check the major components and labeled hardware against the packing list without starting assembly. Keep protective wrapping in place where practical and store the cartons as the supplier instructs. Photograph any discrepancy and include the part number, carton label and order number when contacting the seller.
When parts are missing or damaged
Ask the seller or manufacturer for the specified replacement and tell the installer which work is affected. A substitute beam, bracket or fastener is not automatically equivalent to the part in the manual. Do not schedule work that depends on unresolved structural parts.
Cutting, drilling, welding or substituting components can change the product or its engineering assumptions. Any proposed modification needs a written explanation of what changes, who approves it and whether the manufacturer’s requirements or project documents must be updated.
Photograph the patio and the access route
A useful site photo shows more than an empty patch of patio. Take one wide photo from each side of the proposed location. Include the house, roof edge, doors, windows, eaves, gutters, walls, fences and nearby equipment. Then photograph the route from the street to the work area, including gates, stairs, narrow passages and overhead obstructions.
Mark the approximate post locations in the photos if you can do so clearly. Photograph the mounting surface at each location. If the pergola will attach to the house, include close views of the proposed connection area and wider views that show how it relates to the roof and openings below it.
These images do not replace a site visit or structural review. They help the installer identify the questions that must be answered before a crew and equipment are scheduled.
- Take wide views from more than one direction so the surrounding house and yard remain visible.
- Add close views of each proposed post position and any wall connection.
- Show the delivery and equipment route, including gates, stairs, narrow passages and overhead obstacles.
- Include drains, changes in elevation and nearby equipment that could affect the layout.
Check the base before pergola anchoring is planned
Concrete can look solid at the surface while its thickness, reinforcement, edge distance or condition remains unknown. A finish slab that performs well for furniture and foot traffic may not have been designed for the loads and anchors of a freestanding structure.
The kit documents may show base plates and anchor locations, but the installer still needs to review the support below them. Cracks, joints, slopes, drains, embedded utilities and proximity to an edge can affect post placement. Some projects may need separate footings or other work before assembly begins.
Avoid asking an installer to approve the slab from one distant photo. Provide any drawings or records you have and expect the final support decision to depend on the selected system, the property and applicable review requirements.
Pavers, tile and other surface finishes also need to be distinguished from the structural support beneath them. Gather any existing slab or footing records and ask what additional inspection or design information is needed for the selected kit. A photograph documents the location; it does not prove the base is adequate.
Wall-mounted kits need a clear house connection
A wall-mounted pergola is not simply a freestanding kit with two posts removed. The house connection carries loads into the existing building. Siding, stucco and trim do not show what framing or structural support is behind the finished surface.
The installer needs the correct wall-mounted manual and clear information about the proposed attachment height, door and window clearances, eaves, gutters and roof drainage. Engineering or permit documents may define an attachment that differs from a product illustration. Do not schedule installation until the accepted attachment detail is clear.
Keep the mounting type in the project file even if the pergola is still boxed. A decision to change from freestanding to attached, or to change the specified connection height, should be reviewed before work begins.
Plan where rainwater will discharge
Where a kit uses gutters, channels or concealed post outlets, identify where each outlet will discharge. Keep the water path clear of doorways, neighboring property and places where runoff could create a drainage or slipping problem. The selected roof’s documents should explain its drainage arrangement.
The patio slope and post elevations matter too. A layout that appears symmetrical on a drawing may sit at different heights in the yard. Identify the system’s level or slope requirements before post locations and anchors are finalized.
Separate electrical readiness from kit assembly
Motorized louvers, integrated lights, heaters, fans, screens and smart controls add more than assembly time. The proposal should identify who supplies power, who makes electrical connections, which accessories are compatible and when testing will occur.
Do not assume that a nearby receptacle is the planned power source. Review the manufacturer documents and local requirements. If electrical work is outside the pergola installer’s contract or license scope, the homeowner may need a properly licensed electrical contractor.
Accessories should be included in the document review even if they will be added later. A heater, fan beam, screen cassette or lighting channel can change clearances, wiring routes and the most efficient assembly sequence.
Include the electrical specifications supplied with the ordered equipment. Record where a suitable power supply is proposed and who will confirm it. Assembly, a new circuit or outlet, electrical connections and final operating tests are distinct tasks that need an agreed scope.
Confirm permit and HOA requirements for the address
The CSLB’s building permit guidance directs property owners to their local building department because requirements differ between jurisdictions. Ask about the proposed structure at the actual address, including its size, mounting, roof and any electrical scope. Buying a kit does not establish an exemption.
An HOA or architectural committee is a separate, private review. HOA approval does not replace a government permit, and a permit does not replace HOA approval. Find out which documents each body needs and agree who prepares, submits and follows up on them.
For an unincorporated property, confirm the reviewing authority by address rather than assuming that the nearest city handles the application. Record approval status and any unresolved conditions before the assembly date is set.
Keep product warranty and workmanship terms separate
Read the current warranty for the exact kit and ask the seller about any unclear installation, modification or maintenance conditions. Hiring a professional does not automatically preserve, extend or replace the manufacturer’s coverage.
Ask two separate questions. What does the manufacturer cover for the product, motor, finish and accessories? What workmanship warranty does the installer provide for the labor in the signed contract? One does not automatically replace the other.
Keep the order confirmation, serial or model information, manuals, photographs and final contract. If a problem appears later, those records help identify whether the question concerns the product, the installation, the property or maintenance.
A company’s warranty for products it supplies should not be treated as coverage for a kit purchased from another retailer. For that kit, confirm the manufacturer’s product terms and the installer’s workmanship terms separately in writing.
Agree who handles each task
Assembly is only one part of getting a purchased pergola ready for use. Before scheduling, make sure the written scope assigns the product, property, approval and electrical tasks to named parties. Explain what happens if a missing component or unfinished site work prevents the crew from proceeding.
| Task | What to put in writing |
|---|---|
| Product and shipment | Who receives, stores and inventories the kit, reports damage and obtains correct replacement parts. |
| Site and mounting | Who reviews the base and house connection, specifies anchors and completes any agreed preparation. |
| Approvals | Who prepares drawings, submits permit or HOA applications and follows up on required review. |
| Power and accessories | Who supplies power, performs electrical work and confirms accessory compatibility and testing. |
| Completion and delays | Who removes packaging, performs the walkthrough and handles rescheduling if parts or site work are unresolved. |
When you are ready to engage a California contractor, use the official CSLB license lookup to check the record and confirm the proposed work is within the contractor’s scope.
Build one project file before assembly
Gather these items in one folder or message before the project review. Check each item as you collect it. Photos and documents help establish what still needs a site visit or specialist review.
0 of 10 items gathered.
With the file ready, explore professional installation for a customer-supplied pergola in Orange County. The kit and property still need a project-specific review before work is accepted.
When to pause assembly scheduling
Pause and resolve the affected work when any of these conditions is present:
- The model or series is unidentified, or the manual does not match the delivered kit.
- A structural component or specified fastener is missing or visibly damaged.
- The kit was partly assembled or modified without records of what changed.
- The proposed support or house connection still lacks the information needed for review.
- Power, required approvals or responsibility for site preparation remains unresolved.
- A requested field modification has no written explanation or approval path.
Tell the seller and installer about the issue early. Keep photos and written correspondence, and confirm what must be resolved before a new assembly date is agreed.
Questions about pergola kit readiness
How do I find the right manual for a pergola kit?
Match the manufacturer, model, series or generation, size and mounting type to the order confirmation and carton labels. Use the manufacturer’s manual library or ask the seller for the exact document. Include separate instructions for ordered accessories; do not rely on a manual for a similar-looking kit.
What should I check when the pergola delivery arrives?
Photograph the shipment and labels, compare carton counts with the packing list and record visible damage. Follow the seller’s inspection and reporting process. Before assembly, verify the major components and specified hardware, keeping labeled parts organized and protective packaging where practical.
Can I replace a missing pergola fastener with one from a hardware store?
Do not assume a similar-looking fastener is equivalent. Identify the specified part and ask the seller or manufacturer for the correct replacement or written guidance. Tell the installer which work is affected; structural components and hardware should not be substituted without an accepted basis.
What information helps assess an existing concrete patio?
Provide close photos of the proposed post locations and any available slab or footing records. Surface appearance alone does not establish thickness, reinforcement or anchor suitability. The selected structure, post positions, base condition and required review determine whether additional inspection or support work is needed.
Does buying a pergola kit mean I do not need a permit?
No. A kit purchase does not determine permit status. Ask the building department responsible for the property address about the proposed structure and scope. If an HOA applies, check its separate approval process too.
Does professional assembly automatically protect the manufacturer’s warranty?
No. Check the current product warranty and assembly requirements with the manufacturer or seller. The installer’s workmanship terms are separate. Keep the exact product documents, project photos and written contract so later questions can be matched to the product, labor or supporting property.
Sources and manufacturer documents
- CSLB building permit guidance
- CSLB contractor license lookup
- BON Pergola installation guides
- PERGOLUX assembly manuals
- Hanso Home pergola manuals
Brand names and trademarks belong to their respective owners. References help homeowners locate product documents and do not imply affiliation, endorsement or acceptance of every model.
After the checklist
Ready to review your purchased pergola?
Have the model, manual and site photos ready? California Pergola Systems reviews qualifying customer-supplied pergolas for installation in Orange County. The product, property and requested work determine whether the project is a fit.
Request a Project Review